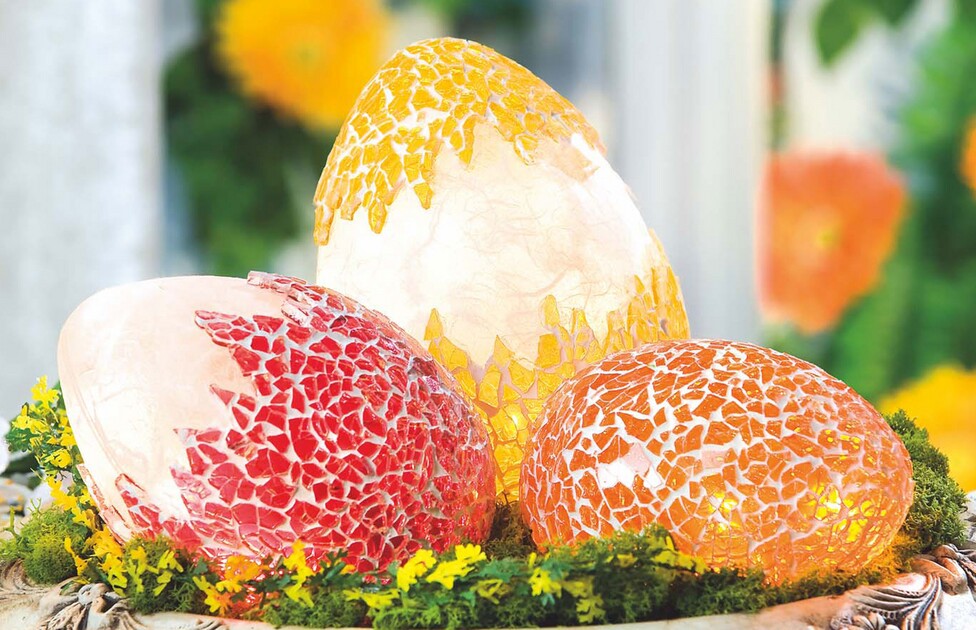
With the latest Crackle-Mosaic technique, effective decorations can be conjured up.
This time we have big eggs Acrylic-with Crackle-Mosaic stones and pasted Straw silk paper . With the inserted chain of lights this Easter decoration idea becomes really atmospheric and guaranteed individual.
Handicrafts from Straw silk paper-Acrylic eggs
First put the individual Acrylic-eggs together, then pinch off the hanging loop with a side cutter and melt a hole of approx. Ø 1 cm with the tip of a hot glue gun. Remove any burrs with a cutter knife
Then glue small Straw silk paper-pieces with Napkin varnish onto the Acrylic-eggs, which are not completely covered with Crackle-Mosaic should be. If you stick the Straw silk paper only on the surfaces that will be left free later, you have an easy way to mark the prongs in advance.
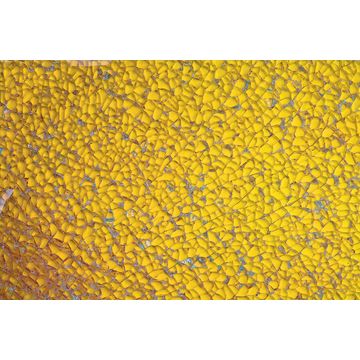
Stick on crack mosaic
Attention: Before you start working with Crackle Mosaic, protect your hands from cuts. When sticking the mosaic on your hands, be aware that these mosaic particles may have sharp edges.
After the Napkin varnish has dried, the Crackle Mosaic is glued on: Put some silicone glue on a Acrylic-egg, carefully remove a piece of the Crackle Mosaic from the Crackle Mosaic plate and put it into the silicone. With the Crackle beater, carefully tap the particles into the silicone, creating the typical mosaic joints.
Tip: For the jagged edges of the "egg shells" use pointed Crackle Mosaic pieces. Design all three Acrylic-eggs this way.
Then allow the silicone glue to dry for about 24 hours. Afterwards, cover the edges with crepe-Adhesive tape and mix the Joint Filler according to the manufacturer's instructions. Carefully apply the Joint Filler with the stirring wood, allow the compound to set briefly and remove the compound with a paper towel, then wipe the surface with a damp, not too wet sponge. After 24 hours drying time, clean the surface with a soft cloth.
Finish
Put the bulbs of a string of lights into the prepared holes of Acrylic glass eggs. Arrange the mosaic eggs together with some moss or with decoration-Willow in a bowl - ready is an enchanting light source for the Easter time.