Creative things for the start of school
Anleitung No. 1788The first day at school is something very special!
To make this day unforgettable, we have put together many great ideas for the celebration and for the desk of your ABC shooterWith our ideas and handicraft materials you can easily realize great handicraft projects for the school day
An induction ceremony with family and friends is a great occasion to get together and talk about past and future times. For this occasion we make an individual invitation and then set the table with lots of handicrafts and small gifts
Discover our ideas for starting school right away
Let's start with the invitation cards
Invitation cards for the Start of school design
First cut the motif photo card and then stick it onto Adhesive tape the card with double-sided adhesive.
Next, punch out a circle from Kraft paper one of the circles and then punch out smaller circles from the lined or/and checkered photo cardboard. The smaller circles are now glued onto the larger ones.
Now use the stamp to stamp a motif of your choice on the circle. In this example we have chosen our Clear Stamps Set "Training". Punch two holes in each circle Kraft paper with a hole punch. Cut a piece to size, place Cord it decoratively around the map and pull it through the holes and make a knot
And there you have your invitation cards for the school enrolment!
Great ideas for your school enrolment party
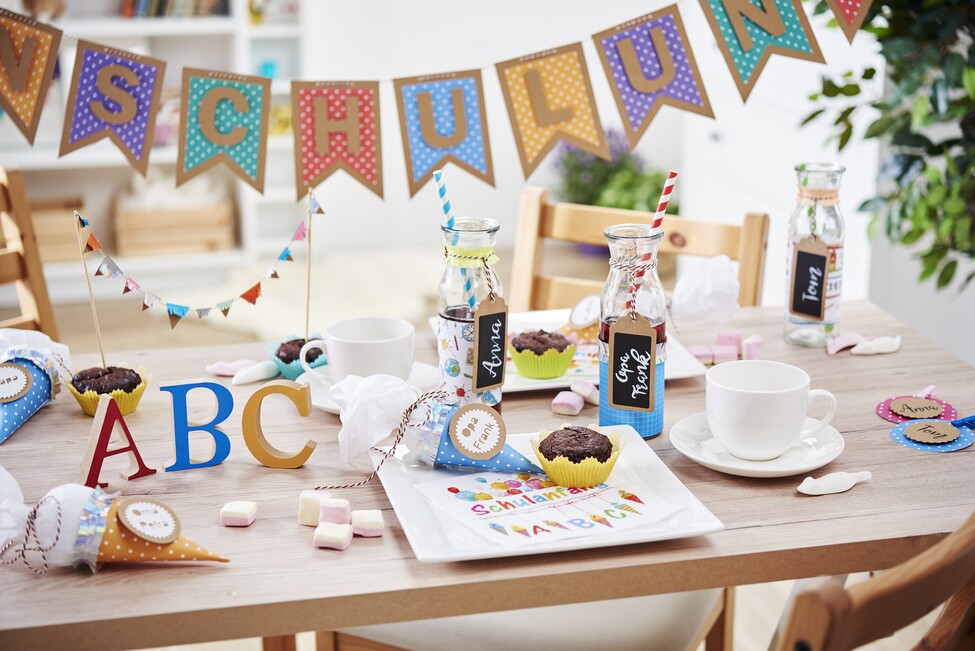
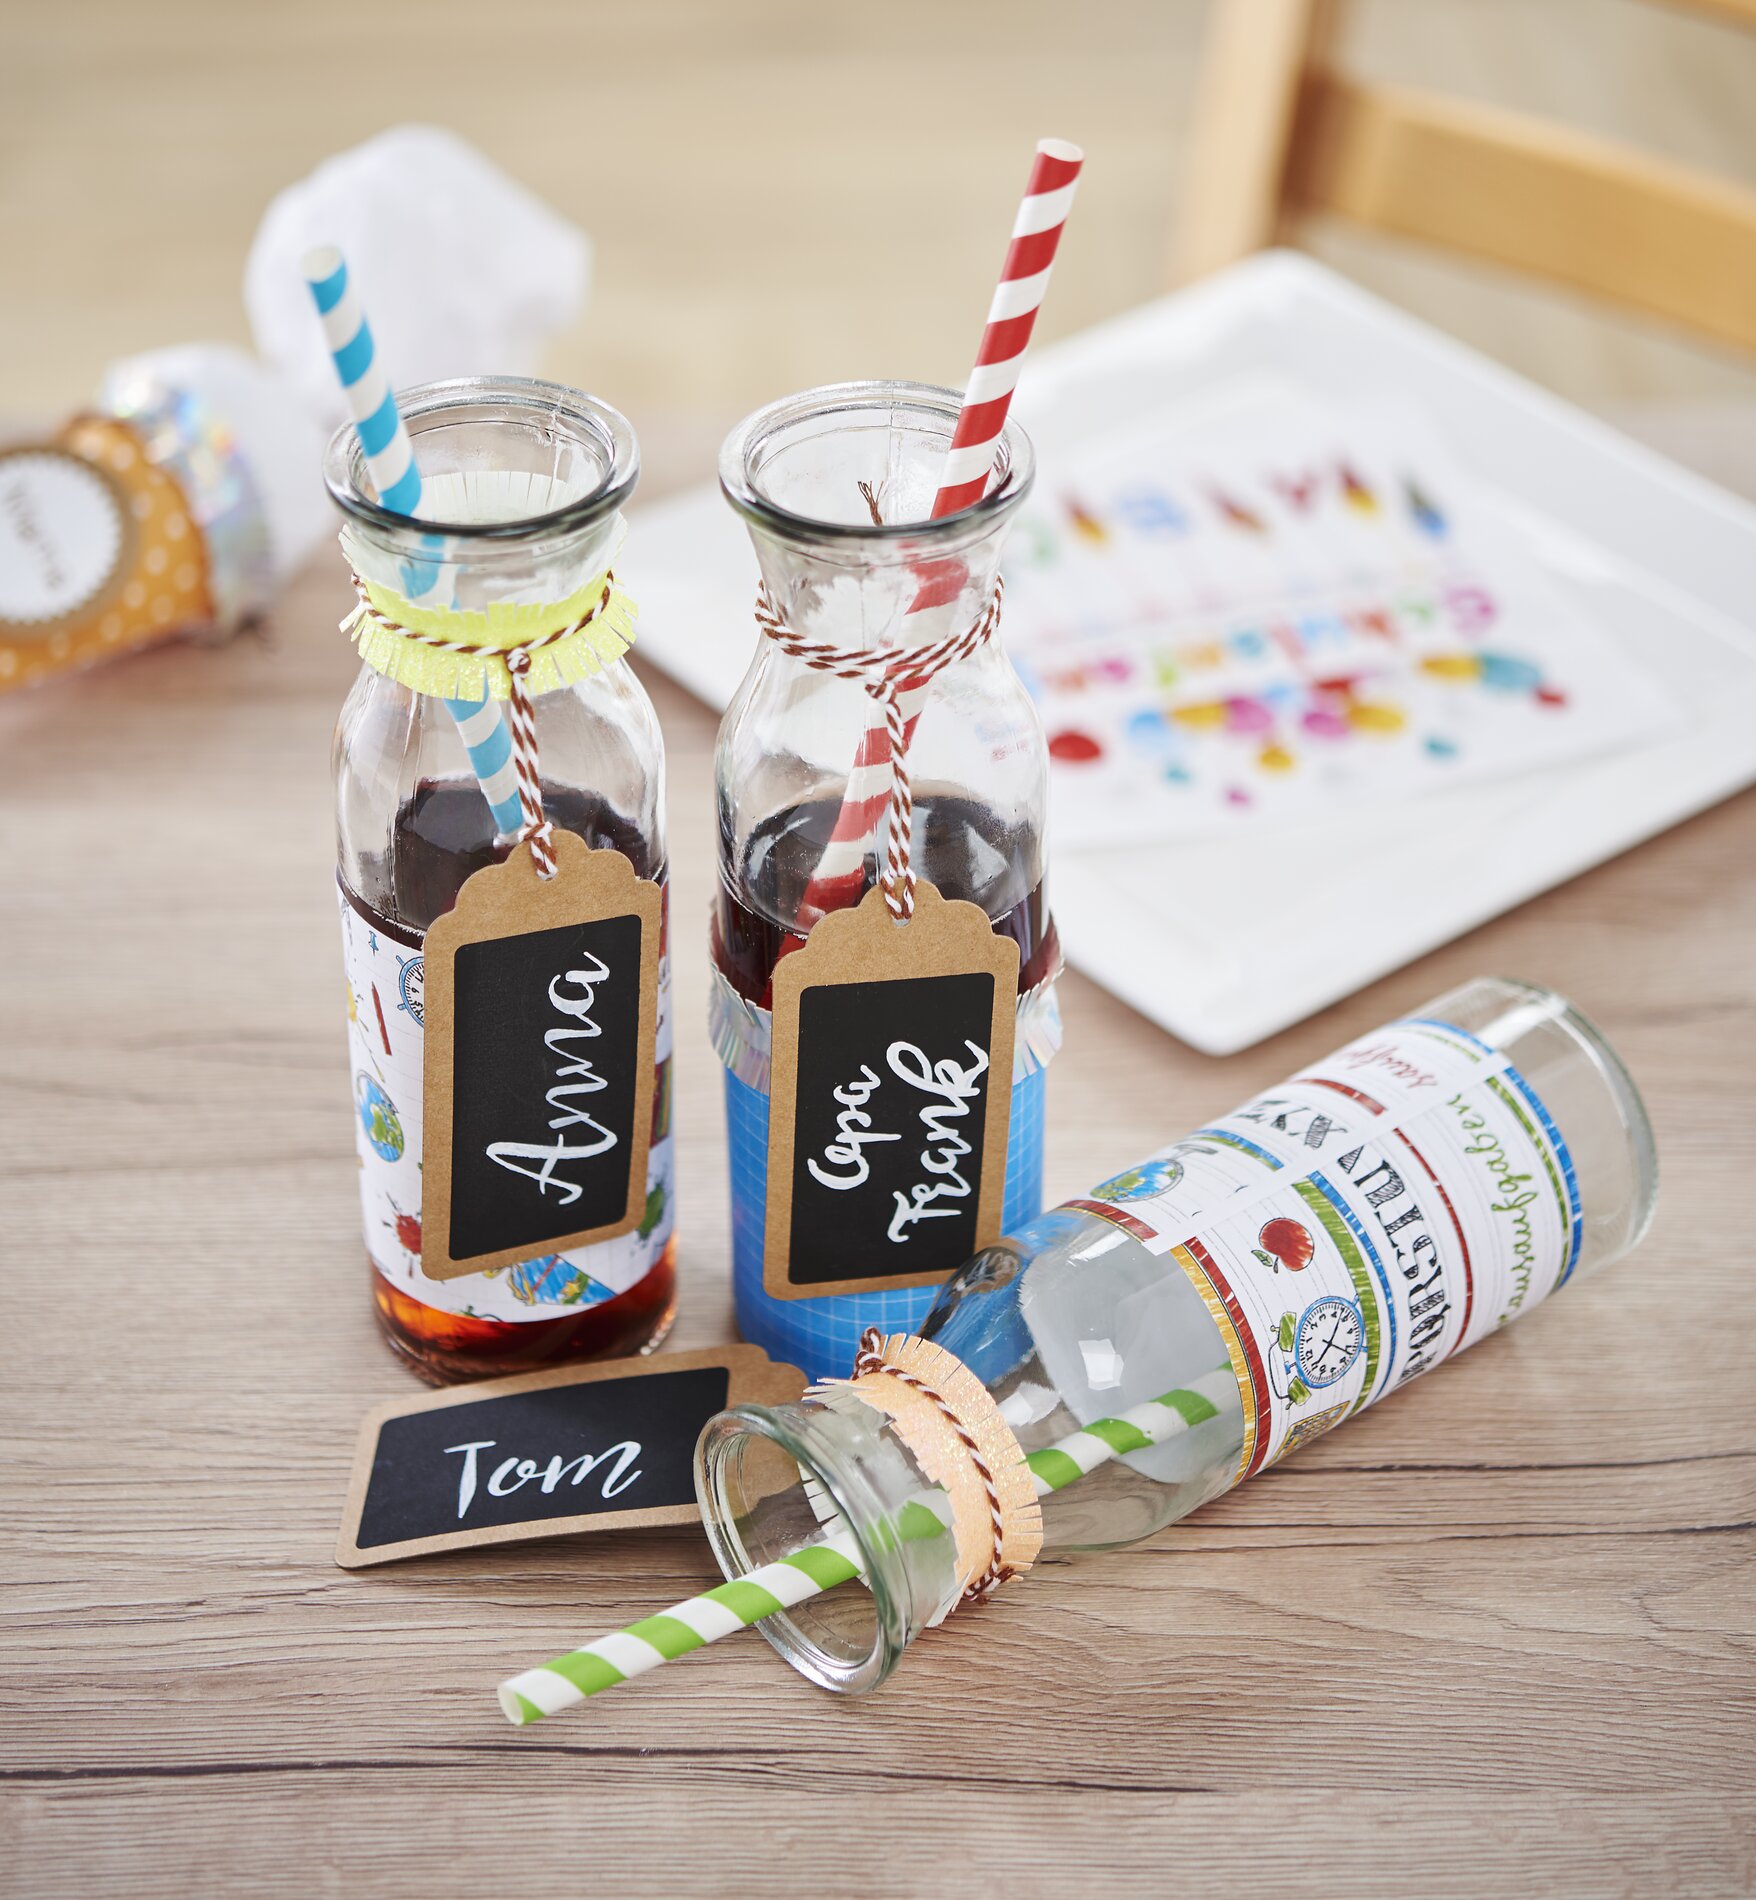
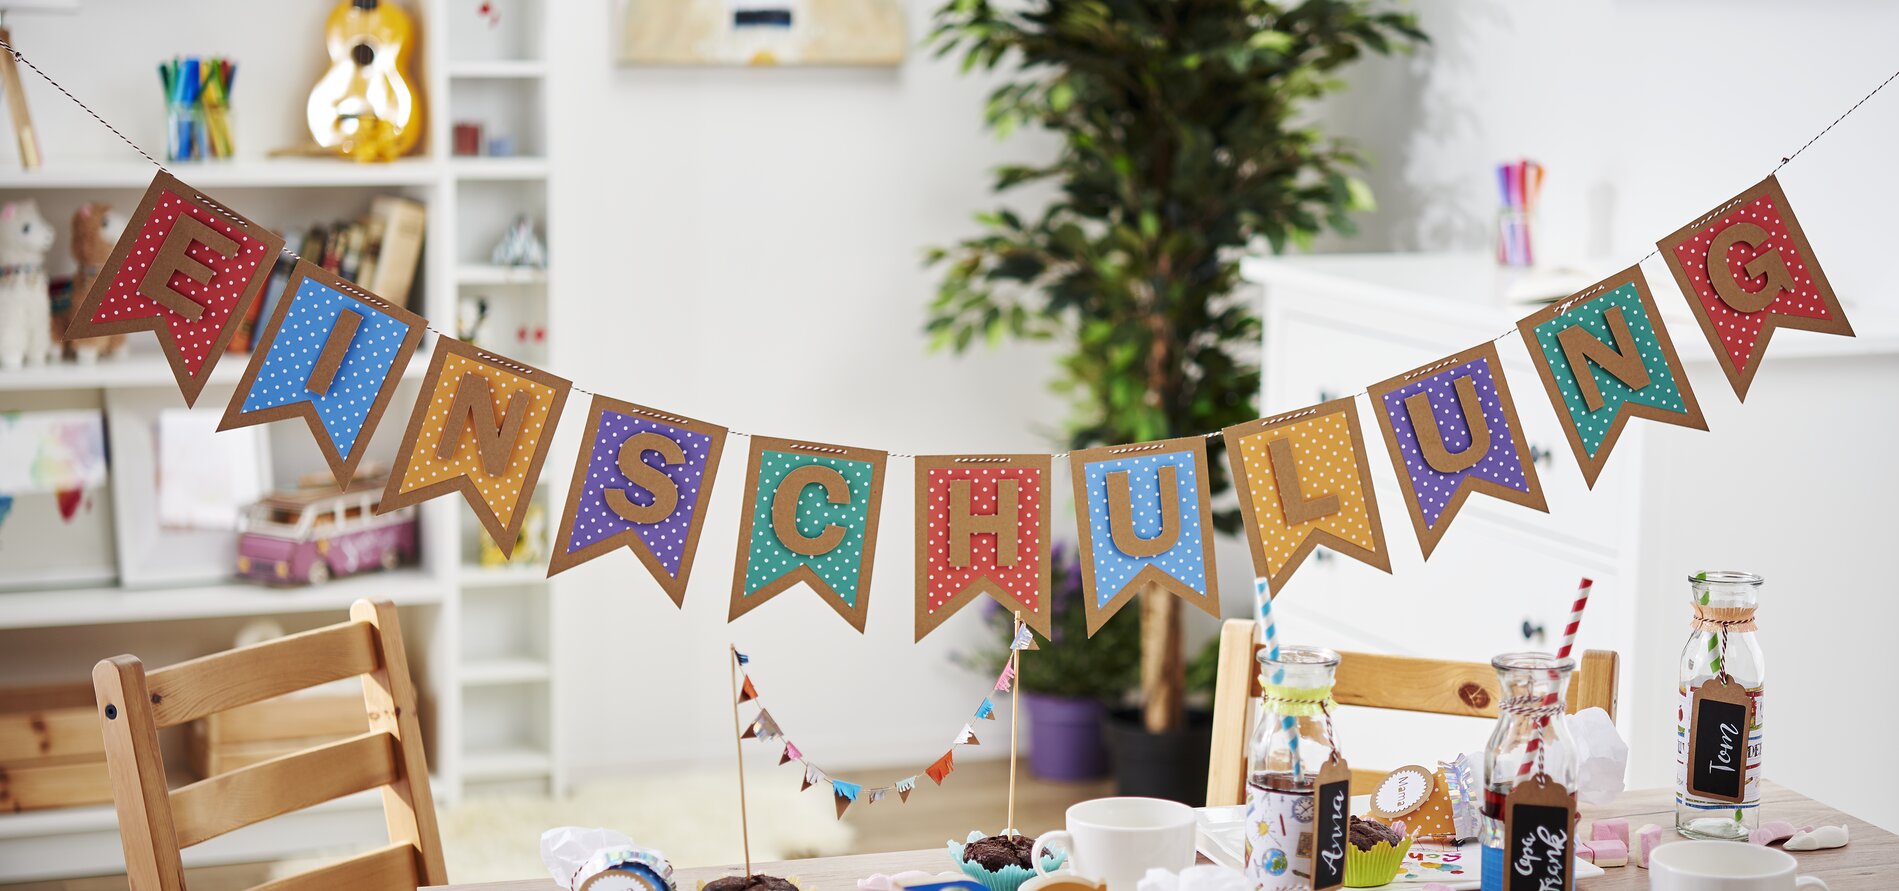
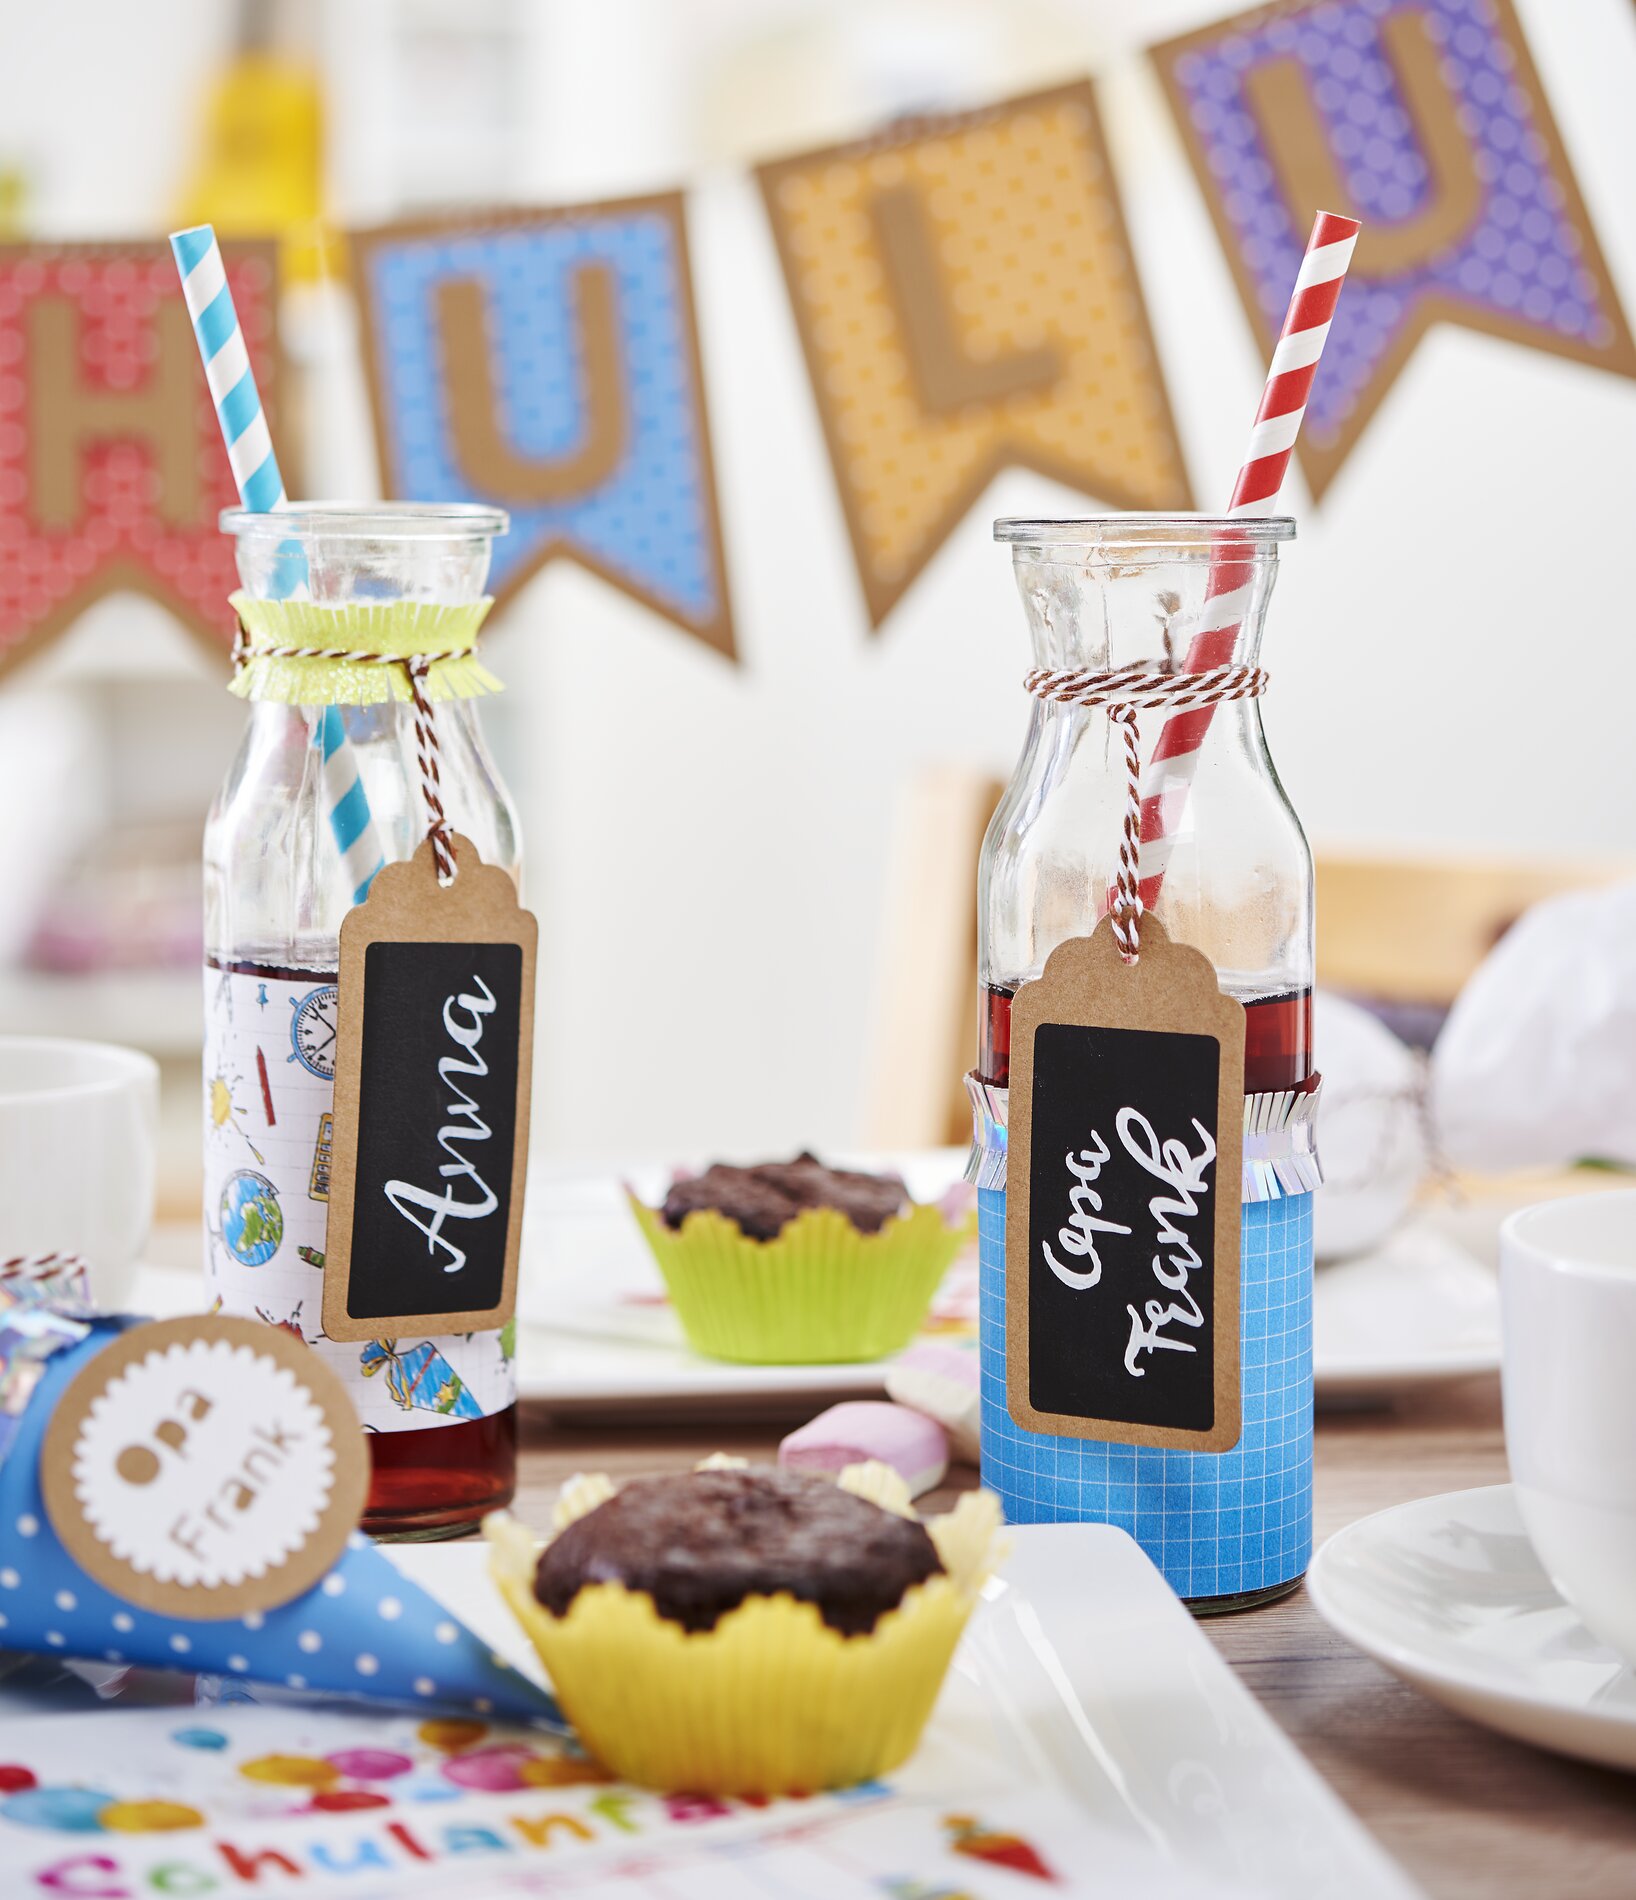
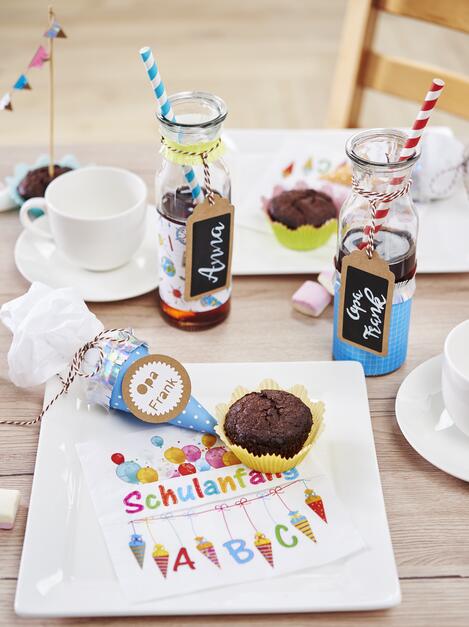
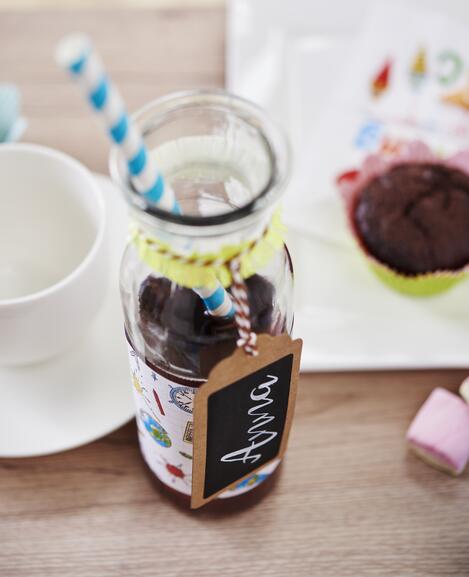
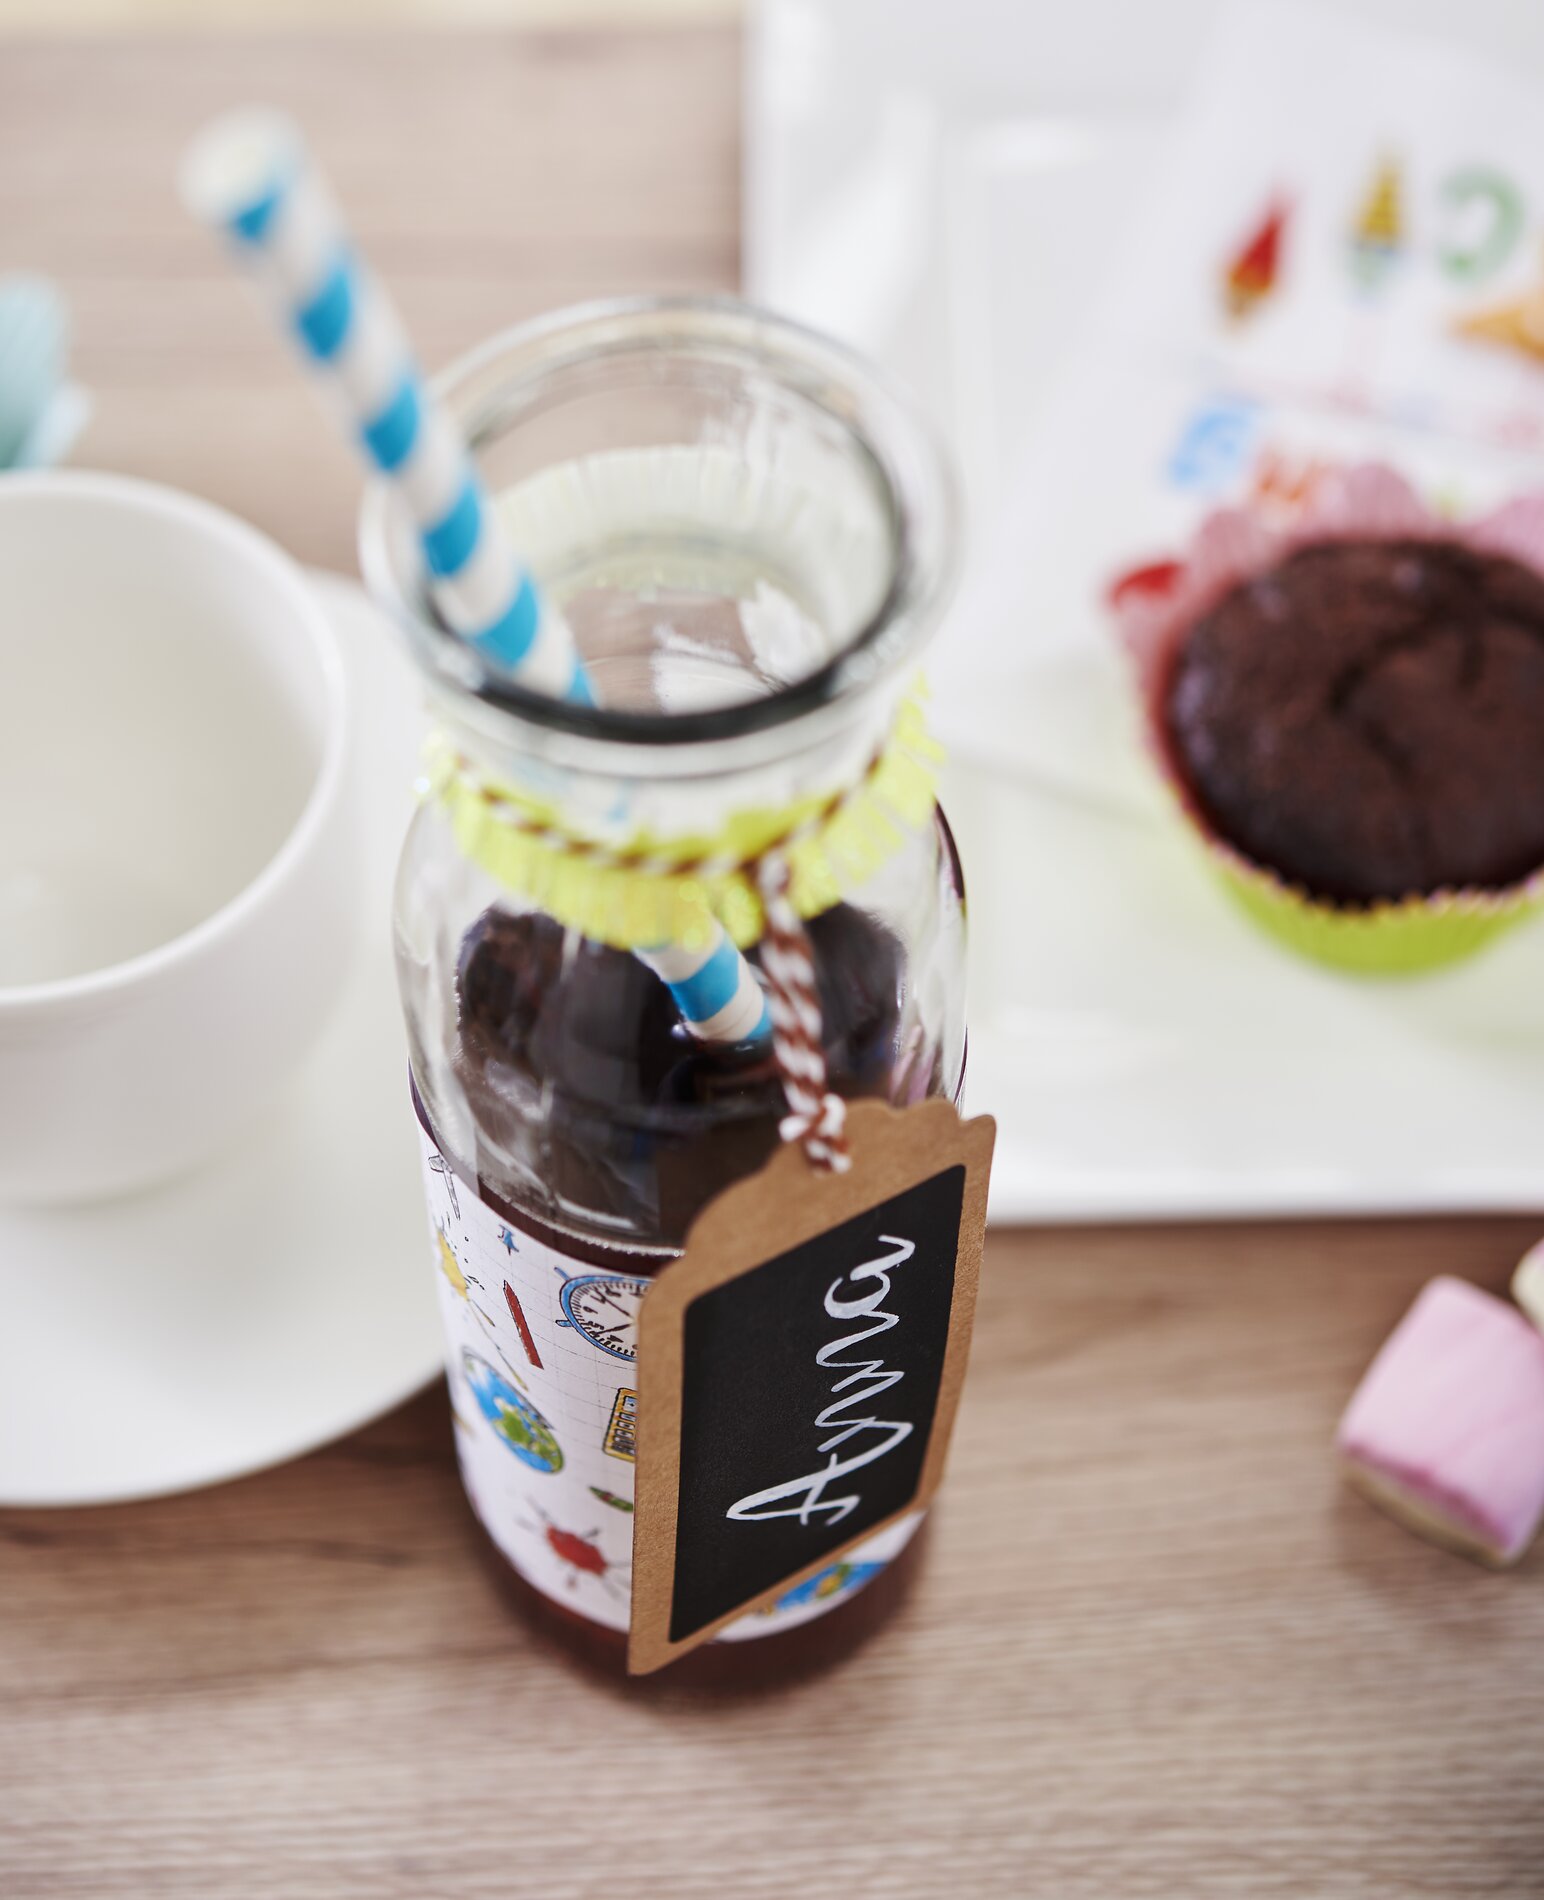
Beautiful glass bottles for your school enrolment party!
First cut a piece of motif photo cardboard and stick it with double-sided to Adhesive tape the glass bottle. Cut out a strip of glitter paper and use scissors to make small cuts at small intervals on the long side of the strip
Important! Take care not to make the cuts too deep, otherwise they can Paper easily tear!
Next, cut a piece to size Cord and use it to attach the tags to the bottles.
Last but not least, pour in milk or other delicacies, pure and Straws ready!
MDF Letter Deco
Paint the MDF letters in the colour of your choice with Handicraft paint. If the MDF still shines through, you can apply a second coat of paint. For our letters we have applied colour to the only front and left the sides in the original colour for contrast.
Mini school cones as a flagellum and as a souvenir
For the mini schoolbags, unscrew the cylinder and glue Adhesive tape it Kraft paper, with double-sided adhesive. Cut them Straw silk paper to size and glue them to the upper edge with double-sided Adhesive tape adhesive. Then you can decorate the school bags with any kind of paper. Afterwards you can decorate the edge with glitter paper, which you cut fringed
Then fill the bag and close it with a plastic bag. Finally, punch Cord. out name tags which you stick to the school Glue pads bags with 3D
Tip: These small schoolbags are a great eye-catcher as a souvenir on the plate of the guests. This bag is also a great gift idea for the little sibling or as a souvenir.
Pennant chain
For the large pennant chain, cut out pennants in Kraft paper your desired size. We plotted the letters and glued them on with 3D Glue pads . Of course you can also make the letters without a plotter. Draw the respective letter in advance Kraft paper and cut it out. Pierce two holes in each pennant with the hole puncher and pull one Cord through. Repeat this process until you have all the pennants you want on your string and you can now greet the new schoolchild at the front door or in the room.
Name badges
Punch out one large and one small circle each for a name tag. Write the name on the small circle and stick it onto the large circle using 3D Glue pads .
Mini pennant chain
Glue glitter paper and/or Craft cardboard sheet. cut the mini pennant chain beforehand and cut fringes into the glitter paper if necessary. Tie the ends to bamboo skewers. For a secure hold, it is recommended to fix the garland to the bamboo skewers with glue. A decorative decoration for your cake or muffins is already created.
Practical for the desk
Homework book / notebook
Design your own personal homework booklet in a only few minutes! Cut for our VBS Notebook a 14x9 cm rectangle from the motif photo cardboard. In the next step, glue the rectangle to Adhesive tape the front of the notebook using double-sided adhesive. Alternatively, you can also stick on a picture or make Kraft paper a name tag. Now cut a piece of the notebook about 40cm long. Take the piece double and knot the end together.Tip: If you open the notebook more often, you can also glue the loop so that the book can be opened and closed without the knot
Done! Have fun with your notebook!
Magazine file
Prime the upright collector with white Handicraft paint. After drying, sand lightly to repair any unevenness. Then paint into the blotches Basic Colours .