It's that simple
For the later suspension of the
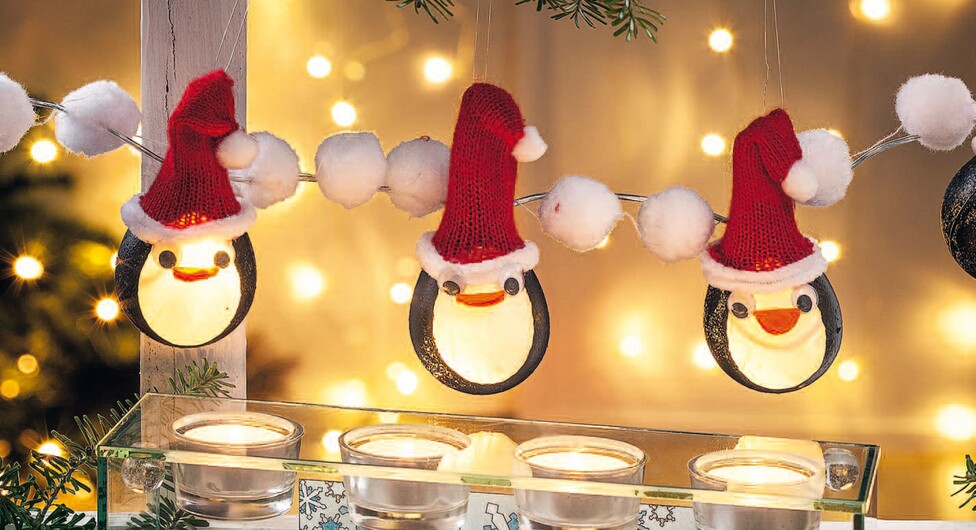
Acrylic drops using a string of lights, first melt a hole in
the narrow area of the Acrylic drops.
Tear them into Straw silk paper small pieces. Draw an oval shape as a "belly
" on each penguin with the help of the "Strich-Ex" pencil Acrylic form. Napkin varnish Straw silk paper-
As soon as this has Paper dried, the entire Acrylic form belly except the white belly is Handicraft paint VBSdabbed with black (Hobby Color)
For the Santa caps use one piece of red
Knitted tube. This is put over the tip of the drop as a cap, the end of the cap is simply sewn together with sewing thread. Fix the end of the cap on the stick Acrylic form, a small decorative pompom on each cap and white as a "brim" Chenille wire around the wide end of the tube.
Now cut out from Felt the beak. With hot glue you can form the beak and the on each Wobbly eyes penguin to a sweet face
In each "penguin" two lamps of the fairy lights are inserted through the initially melted hole, the fairy lights cable is wrapped with the pompon chain.
Extra handicraft tip:When painting on the black Handicraft paint , they first "draw" the
contour of the belly with a fine brush. Once the critical contours are coloured black, you can easily
apply the remaining black paint with a
sponge brush