- Secure order
- Easy return shipment
- Service-Hotline 01 662 20 20
Instructions No. 3213
Difficulty: Beginner
Working time: 2 Hours
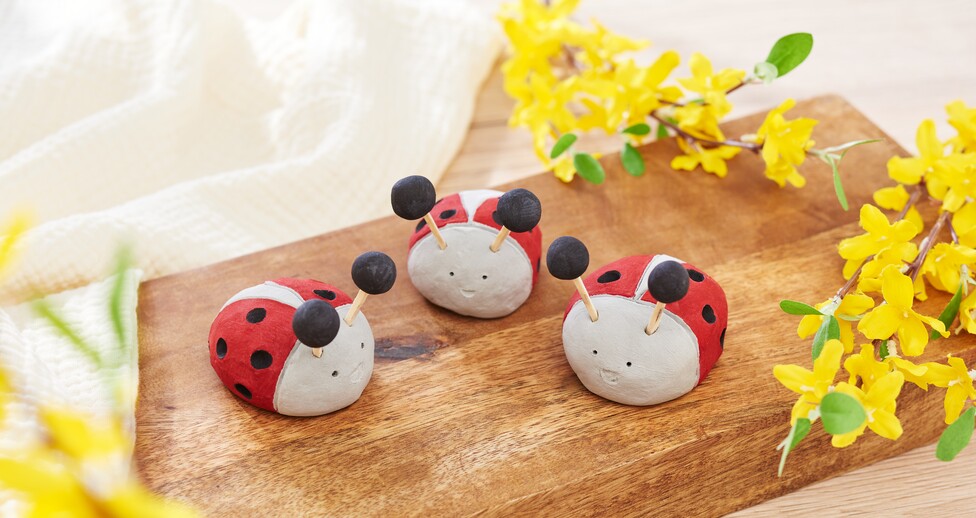

Step 1: Preparing the modelling clay
To start, cut off as much of the modelling clay as you like and knead well. The thorough kneading ensures that the mixture is smooth and easy to shape.
Step 2: Shaping the ladybug
Use the kneaded modelling clay to shape the body of the ladybug. Remember to also shape two small balls that will later serve as antennae.
Step 3: Add details
You can get creative here. You can either paint the characteristic dots on the ladybug's wings later or use a round stick to press them into the modelling clay now. Also use modeling tools to carve the ladybug's face and fine lines. If there are any bumps or cracks while working, you can smooth them out with a little water.
Step 4: Positioning the antennae
Take the craft sticks and stick them in the place where you want the antennae to be and place the beads on top. However, pull the balls off again immediately so that they can dry separately. You can then paint them without any problems.
Step 5: Dry and paint
Once everything has dried well, you can paint the ladybugs with permanent markers. Be creative with the colors and patterns! Don't forget to decorate the balls, which will later be placed back on the craft sticks.
Step 6: Final assembly
As soon as the paint has dried, place the painted balls back on the craft sticks and your individual ladybugs are ready!
Now it's up to you to enrich the world with your homemade ladybugs from modelling clay .